
Secure Your Mac. Step 1: Know Thy Enemy
The first step to secure your Mac is deciding just how much security it needs. Let’s say you are walking on a sidewalk by a very quiet street. Coming toward you, on a building top, you see a man dressed in black. He seems to be zigging back and forth, crouching, then standing and running. Very strange, but at least he is on a building top and not on the sidewalk in front of you. Maybe it’s just someone playing. Then, the man disappears. You walk a hundred feet or so, and you see him standing in the shadows of one of the buildings. You glance at him and notice the handles of two Samurai sword over each shoulder, and a rather long knife, sheathed in his belt. His face has a covering, with just his eyes visible, and those eyes are staring directly at you. This guy looks like a Ninja Warrior. Turn away, walk fast, don’t look at him again, and hopefully, you can get by him. You do. You walk a block, turn to look where he stood, and he is gone. Vanished. You were not his target. Lucky day. Then someone taps you on your shoulder, you nearly jump. No worries. Just a guy wanting to know the time. You tell him and continue your walk. Then you hear sounds of someone running away from behind you. You turn and look, and it is the guy who asked for the time. Strange. Then as you begin your walk again, your pants don’t feel right. Something is different. Your wallet is gone. You were a pickpocket’s target.
Coming back to reality, unless you, or something you do, can be defined as “very high-profile”, Russian, Chinese, or North Korean hackers like the Ninja Warrior in the story, are probably not interested in attacking your home or small office computer. Anonymous and other organized hacking groups are also not likely to be interested. That leaves people with less-than-Ninja hacking skills and automated bots. Evil Doers are less likely to bring down your computer(s) but are more likely to break into your computer(s) looking for personal information that will lead to the theft of your identity. Sort of high-tech pickpockets. Make no mistake, these guys can create a lot of damage to you, but they are not Ninja grade hackers. As for bots, they are executable programs traveling the Internet looking for ways to access your computer. Once inside your computer, they attempt to install software to do many things, all bad. So, your security concerns center on protecting your computer and its data from high-tech pickpockets, and bots. Both of these Enemies require access to your computer to do their evil, so the logical defense is to keep up as much control of your computer’s access points as possible.
The next step for you is to decide just how much convenience in operating your computer are you willing to sacrifice? The more layers of security you add to the computer, the less convenient operating it will become. Keep in mind that having your identity stolen can be inconvenient, as well as time-consuming to correct, and expensive. Some inconvenience should be tolerable.
What follows is not intended to be an all-inclusive document providing detailed instructions on each element or configuration involved to totally secure a Mac. I don’t know that such a document is possible, because as technology changes, so do the ways to defeat it. What this document attempts to offer are some basic, free, or inexpensive ways to cut the risk of high-tech pickpocket’s gaining access to your computer and its data. For some of these security elements I explain “How to” add the element/configuration to your computer, and for some elements, in the interest of brevity, I will give a link to a resource that will provide that information.
Secure Your Mac. Step 2: Control Access Points
Passwords
- Create a new User (using whatever name you want), and set this User to be without Administrative Privileges. Use the new User when you log into your computer for routine work. In this way, you will be prompted when Administrative access is needed, and if necessary you can give the Admin password. Once inside your User account, a hacker is now required to have knowledge of the Admin password to install malicious code.
Click the icon for System Preferences, then Users & Groups. Once the window opens, click the padlock in the lower left corner of the window, and supply the Admin password. Now click the “+” directly above the padlock, and follow the instructions to add a new user.
- Disable automatic login. This forces username and password prompts when you start your computer.
Click the System Preferences icon from the toolbar, then click “Users and Groups”. Click the padlock icon and provide an Admin password. At the bottom of the left column, click “Login Options”. On the next window set Automatic Logins to “Off”.
Next, set “login to be done from sleep” mode. Go to System Preferences > Security & Privacy. Click the padlock and supply the Admin password. On the General tab, click to turn on “Require Password XX minutes after sleep or screen saver begins”. Replace the 2 X’s for an interval of time you do not want to have to enter a password upon waking the computer. For example: Setting a time interval of 10 minutes, means that if you wake the computer anytime within the 10 minutes of sleep or running the screen saver, you will not have to enter a password.
- Routinely change passwords (do not use the same password for multiple logins), and use a password manager like LastPass.
- Use 2-Factor Identification for your major online services. Once set up, when you log into the service, and you will be shown a window where you will need to add a code. This code is sent by the service to your cell phone. The code is active for a brief period and changes at every login. This makes unauthorized entry to your account difficult without access to your cell phone. At this point in time, this is the safest process to log into any service.
Here are 2-Factor Identification instructions for:
Google https://www.google.com/landing/2step/
Amazon https://www.amazon.com/gp/help/customer/display.html?nodeId=201962420
Apple https://support.apple.com/en-us/HT204915
Facebook https://www.facebook.com/help/148233965247823
Firewall:
From OS X 10.10 Yosemite, Macs come with two firewalls[1]:
ALF: an application-level firewall that can be easily configured using System Preferences Security panel. It allows or blocks network connections at the application level. PF: a network firewall that can be configured using the Terminal or using a third party front-end program, like Murus. It allows or blocks network connections at the network level, letting you build and customize a complex network infrastructure.
By default, both ALF and PF firewalls are by default set to “Off”. Click HERE for instructions to turn “On” the application level firewall. The PF firewall’s configuration is complex. Leave Terminal level setup to the IT pros. Murus, as mentioned above, is ideal for this purpose. Murus has both “free” and “pro” versions. Find out more about Murus by clicking HERE.
Both ALF and PF firewalls are recommended, and as a result, can be used together.
Turn on FileVault.
FileVault2 (the current version) will encrypt the start-up disk on your hard drive. FileVault 2 uses XTS-AES-128 encryption with a 256-bit key to help prevent unauthorized access to the information on your startup disk[2]. This program is already on your Mac.
From System Preferences > Security & Privacy. Unlock the Padlock with the Admin password. Go to the Firewall tab, and click “Turn on FileVault. Please read the extra instructions carefully, click HERE.
Secure Your Mac. Step 3: Anti-Virus Software
Macs do need an anti-virus. There are both “Paid” and “Free” versions of programs available. Not too surprising is the fact that Paid versions have more features. Also, note that “free” versions typically have two things in common:
- In general, they are not as effective as their “paid” counterparts.
- In nearly every instance, the “free” versions (Sophos, Avira, AVG, Clam, etc.) in varying degrees, slow down your computer.
Though more effective in catching viruses and malware, it is worth noting that some of the “Paid” versions slow down your computer as well. I use BitDefender (a “Paid” license for three computers) on the LarryTalksTech Macs. At the moment, it is top rated at defending against viruses and malware, and you can’t tell its running. Click HERE for a review of major “free” and “paid” anti-virus programs for Macs in 2017.
Secure Your Mac. Step 4: Updates
One of the best ways to keep your Mac safe is to keep its software current. If you procrastinate a lot, you can set your Mac to do this automatically:
Click the App Store icon on your toolbar. From the top menu on your screen, click App Store > Privileges. Then click the box for “Automatically Check for Updates”. Then click each box in the sub-section.
Secure Your Mac. Step 5: Backup Your Data
Most people don’t do this until they have had some catastrophic data loss, then they become true believers. Be smart, and get ahead of the problem. There are many backup programs available. A pretty good one, Time Machine, comes with your Mac. To set it up, simply click its program icon, and follow the instructions. If you want something more robust and are not intimidated by the using the terminal and command line, try “rsync” (also already installed on your Mac). For more information about rsync, click HERE.
Once you decide the program you want to use, start a routine where you have three copies of your important data and media. This will include the original data and media, and two copies. We keep all our data and media on a server, and back up to an encrypted drive in a Mac Pro desktop, and also to an external hard drive (also encrypted). The external drive is then kept in a car between backups. This way, should disaster strike our building and destroy its contents, we still have a copy of our data tucked away in one of our cars.
What about backing up data and media to the cloud? In this solution, there are just too many chances for data leaks, and requires too much time to upload the data and media.
Secure Your Mac. Step 6: Use OpenDNS as your Domain Name Server
A Domain Name Server resolves the location name you enter into a Web browser into an IP address for an appropriate Web server. This is like dialing someone’s phone number to call them; however, you don’t need an address book for all the IP addresses on the Internet. The DNS servers offer that function. You provide the “name” (like larrytalkstech.com), and part of the network connection will result in resolving the name into an IP address, like 74.128.0.6.
Your Internet Service Provider, by default, connects you to a DNS service, usually theirs. When it comes to DNS servers, size really does matter. Continuing with the phone analogy, the bigger the phone book the better. The more IP addresses contained therein leads to less switching and faster responses. The big “guns” in DNS servers are Google, and OpenDNS (owned since 2015 by Cisco). Both of these DNS services are World Wide. Because of their size, both Google and OpenDNS have response times often over 100% faster than those of ISP providers. To you, that means faster internet connections.
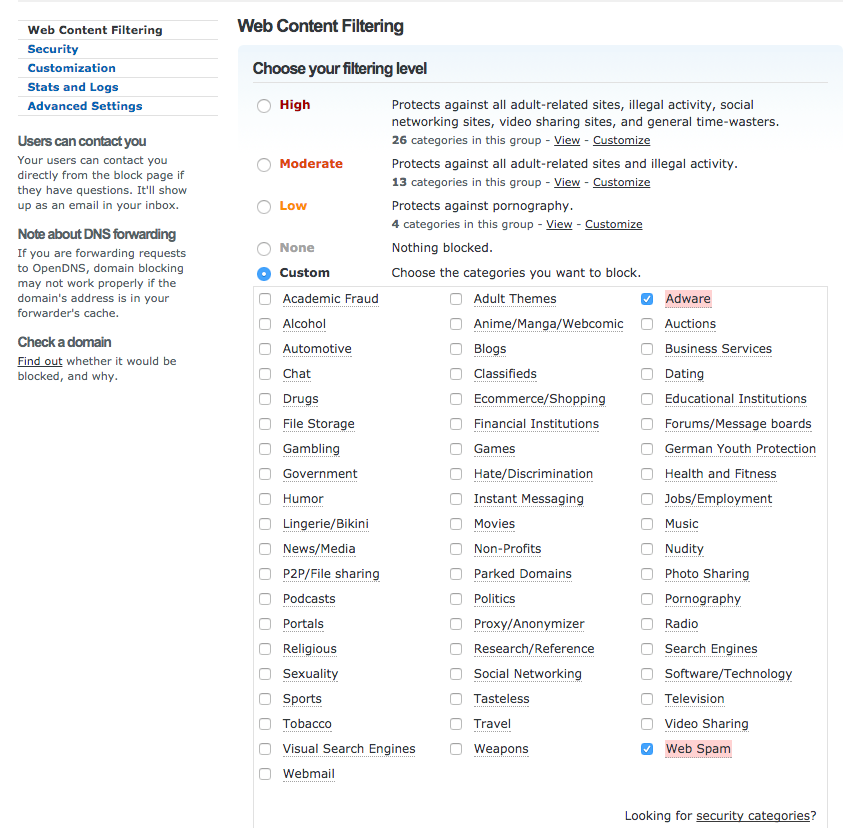
Great. Changing to Google or OpenDNS provides faster Internet speeds. So what does all this speed have to do with securing a Mac? OpenDNS can filter outgoing and incoming connections, giving OpenDNS the ability to offer anti-phishing and built-in identity theft protection, parental controls that can protect every internet device in your home, and customizable filtering (like, eliminating requests to/from porn sites, dating service sites, etc. See graphic below) All of this for FREE!!!! Finally, though we have found Google’s DNS servers to be slightly faster than OpenDNS, Google’s DNS lacks both the levels of security and the customization features offered by OpenDNS.
Secure Your Mac. Step 7. Use A Virtual Private Network On The Internet
A virtual private network (VPN) extends a private network across a public network and enables users to send and receive data across shared or public networks as if their computing devices were directly connected to the private network[3]. When you connect to a VPN, you usually launch a VPN client on your computer (or click a link on a special website), log in with your credentials, and your computer exchanges trusted keys with a faraway server. Once both computers have verified each other as authentic, all of your internet communication is encrypted and secured from eavesdropping[4]. One big advantage of using a VPN significantly is that is reduces the risk financial information, or other private information being stolen as you send it to a source (like buying something from an online store).
VPN’s are for the most part very secure, but there is a downside. All the encryption and special routing usually come at a cost in lost internet speed. The decrement in speed varies from minimal to significant, and depends upon your choice of VPN. Settling on the right VPN for you will need some research. For more information about VPN’s click HERE.
Summary
The seven steps to secure your Mac, as outlined here, do not come anywhere near representing the field of possibilities available for securing a Mac. That being said, these seven steps are both practical, proven, and powerful. Every Mac here at LarryTalksTech has at the bare minimum, each of these steps in play from the first day the Mac was brought into service. It is an unsafe cyberworld out there. So get going. Secure Your Mac.
Sources
- Murus Manual 1.1 | http://murusfirewall.com/Documentation/Murus%20Manual.pdf
- File Vault Full Disk Encryption | https://support.apple.com/en-us/HT204837
- Virtual Private Network | http://en.wikipedia.org/wiki/Virtual_Private_Network
- Why You Should Start Using a VPN (and How to Choose the Best One for Your Needs) http://lifehacker.com/5940565/why-you-should-start-using-a-vpn-and-how-to-choose-the-best-one-for-your-needs
Ninja Warrior | Michael Wuensch | www.pixabay.com